
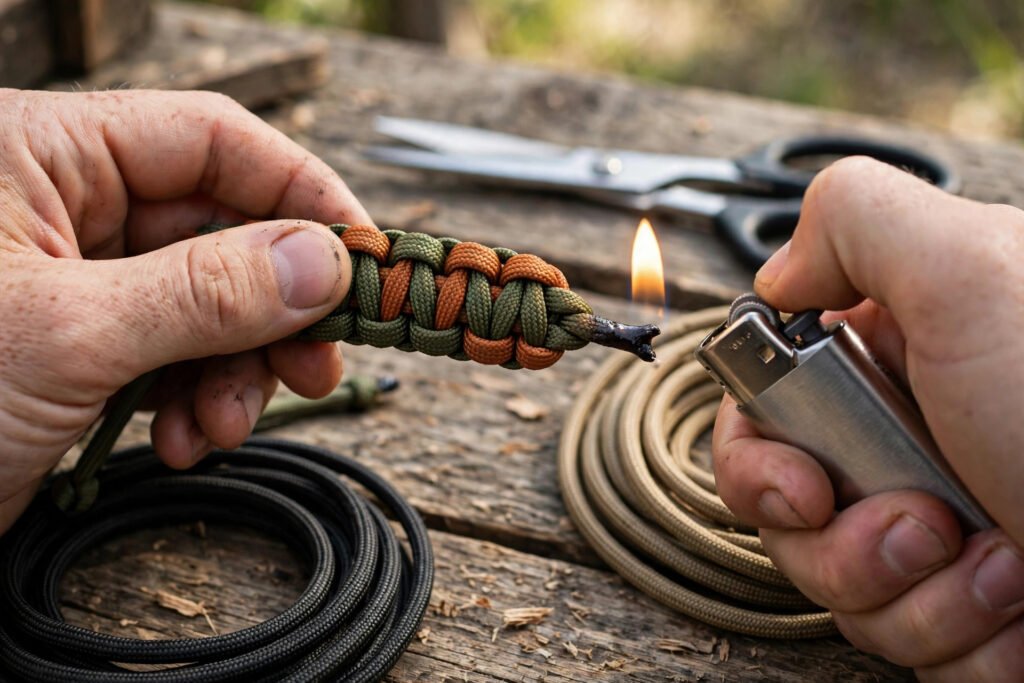
A bracelet can be woven perfectly for twenty minutes and ruined in the last twenty seconds. Cut the tails too short, hold the lighter a second too long, or press a melted end in the wrong spot, and you get a sharp lump that scratches your wrist, a tail that pulls loose a week later, or a weave that unravels from the end.
Finishing is the lock that holds the weave together. This guide covers how to finish paracord bracelet ends cleanly — how much tail to leave, how to melt 550 cord without scorching it, how to press and tuck ends flat on the underside, and how to fix a bad melt.
What a clean finish actually looks like
A clean finish has three things. First, the melted end forms a smooth, flattened cap wider than the cord, so it cannot pull back through the last knot. Second, that cap sits on the underside, tucked against the weave, where it does not rub skin. Third, there is no sharp edge, no scorch mark on the surrounding weave, and no loose inner strands poking out.
All three come from the same habits: leave enough tail, use less heat than you think you need, and press while the nylon is soft — not while it is still in the flame.
Tools you need
- Sharp scissors or flush cutters — a clean cut melts cleanly; a frayed cut melts into a messy blob
- A standard lighter — a basic disposable lighter gives you more control than a torch; torches overheat nylon fast
- The side of the lighter, a coin, or flat pliers — for pressing the melted end flat; do not use a bare fingertip on hot nylon
- Optional: a paracord needle (fid) — for tucking ends back through the weave instead of melting them on the surface
If you planned your cord with the Paracord Length Calculator, you should have a few inches of tail left — exactly what a clean finish needs.
Step 1: Check the fit before you cut anything
Before you trim, close the buckle and try the bracelet on. This is the last moment a sizing mistake is still fixable. You should be able to slide one fingertip under the weave, and it should sit above the wrist bone without being forced.
If you are unsure about sizing, read how to measure your wrist for a paracord bracelet before you melt. Once ends are melted flat, unpicking usually destroys the caps and shortens the cord. Check first, cut second.
Step 2: Leave the right tail length
Trim each working end to about 1/4 inch (6 mm) past the last knot. That number matters:
- Shorter than 1/8 inch: there is not enough nylon to form a cap, and the end can pull through under tension.
- About 1/4 inch: enough material for a cap roughly 1.5 times the cord diameter, pressed flat against the weave.
- Longer than 1/2 inch: the cap becomes a bulky lump, and folding it flat leaves a hard ridge against the wrist.
Cut straight across with sharp scissors. If white inner strands — the 7 inner yarns inside 550 cord — stick out past the sheath, trim them a fraction shorter than the sheath before you melt. The sheath and core should melt together into one cap, not a tuft.
Step 3: Melt — less heat than you think
550 paracord is nylon. Nylon melts at around 220°C (428°F) and does not need to catch fire to seal. If the cord is burning, you have already gone too far.
- Hold the lighter so the tip of the cord sits just above or just beside the flame, not deep inside it. The blue part of the flame is hottest; work at the edge of the yellow part for more control.
- Heat for 2 to 4 seconds, rotating the bracelet slowly so the end melts evenly on all sides.
- Watch for the end to turn glossy and round over into a small mushroom shape. That gloss is your signal — stop there.
- Remove the flame before you press. Pressing while the flame is still on the cord is how surrounding knots get scorched.
A scorched end looks brown or black and feels brittle. A correctly melted end keeps its color, looks shiny, and stays slightly flexible once cool. On light cord, keep the flame farther away — light nylon shows scorch marks dark cord hides.
Step 4: Press the cap flat, on the underside
Immediately after you remove the flame — you have about 2 to 3 seconds while the nylon is soft — press the melted end flat against the underside using the flat side of the lighter, a coin, or scissors.
Press it into the weave, not on top of it. The cap should sit in the valley between the last two bars, roughly flush with the surrounding cord. Hold for a few seconds while it cools.
Repeat for the second end. On a cobra bracelet both ends finish on the same underside — never one on top and one underneath. Let both caps cool a full minute before testing; warm nylon can still deform.
The tuck method: a cleaner finish for thick weaves
On thick weaves like the king cobra, a surface melt can leave a lump. The alternative is to tuck the ends.
- Thread the tail onto a paracord needle, or grip it with hemostats.
- Pass the tail back under 2 to 3 bars of the weave on the underside, following the path of the cord above it.
- Pull it snug so the weave compresses slightly, then trim the tail where it exits, leaving about 1/8 inch.
- Melt that small exit point and press it flat. Because most of the tail is buried, this melt only has to seal, not hold the whole load.
The tuck is the finish used in our king cobra paracord bracelet tutorial. It takes a minute longer and produces the flattest result.
Finishing buckle bracelets vs. knot-and-loop bracelets
Buckle bracelets
Finish both tails on the underside near the far buckle, after the final knot is pulled tight. Keep melted caps at least 1/4 inch away from the buckle slot so the cap does not interfere with the buckle closing or create a hard point at the bend.
Knot-and-loop (no buckle) bracelets
Here the finishing knot — often a diamond knot or a simple overhand stopper — is part of the closure. Trim the tails below the stopper knot to 1/4 inch, melt and press them up against the knot itself, and check that the loop still passes over the knot easily. A cap that is too large can make the closure too tight to open over the hand.
Common finishing mistakes and how to fix them
The cap pulled through. The tail was cut too short or not melted wide enough. If enough tail remains, re-melt and press a wider, flatter cap. If not, tuck a fresh short section through the last knot with a needle and finish that instead — or unpick the last two knots, which frees up working length.
A sharp edge scratches the wrist. Reheat just the edge for 1 to 2 seconds and press it again, rounder this time.
Black scorch on the weave. The flame touched the surrounding knots. A surface scorch is mostly cosmetic, but a deep scorch weakens nylon. If the affected knot feels brittle or cracks when flexed, that section should be rebuilt rather than trusted.
A burnt mushroom on a stalk. Too much tail and heat. Trim the cap off, leave a fresh 1/4-inch tail if length allows, and redo with less flame time.
Safety notes, plainly stated
Melted nylon sticks to skin and causes real burns. Work over a heat-safe surface, keep the lighter away from the loose cord spool, and never press a fresh melt with a bare fingertip. Let it cool for a minute, work with ventilation, and keep the flame away from children and pets.
The final check
Flex the bracelet, pull the buckle ends apart firmly, and run a thumb over both caps. It passes if: no cap moves, no edge feels sharp, no tail pokes out on top, and the fit is unchanged. Pass all four and it is done. For the next one, run the size through the Paracord Length Calculator first. For the cord math behind cut lengths, see how much paracord do I need?
FAQ
How long should I leave the ends before melting a paracord bracelet?
About 1/4 inch (6 mm) past the last knot. That gives enough nylon to form a flattened cap wider than the cord, without leaving a bulky lump. Less than 1/8 inch risks the end pulling through; more than 1/2 inch is hard to press flat.
How long do you melt paracord ends?
Usually 2 to 4 seconds, with the cord at the edge of the flame rather than inside it. Stop as soon as the end turns glossy and rounds over. If the cord catches fire, blackens, or drips, that is too much heat — trim and redo it with a shorter melt.
Why does my melted paracord end keep coming undone?
Almost always one of three reasons: the tail was cut too short to form a real cap, the cap was not pressed flat while it was still soft, or the cap was placed on top of the weave instead of the underside where the weave protects it. Re-melt with a full 1/4-inch tail and press the cap into the underside valley between the last bars.
Can I finish paracord ends without a lighter?
Yes, with limits. A tuck finish — threading the tail back under 2 to 3 bars with a paracord needle and trimming it close — holds well on tight weaves even without a melt, and a small drop of clear super glue on a trimmed end can slow fraying. Neither is as reliable long-term as a proper melt-and-press, so treat them as field fixes rather than the standard finish.