
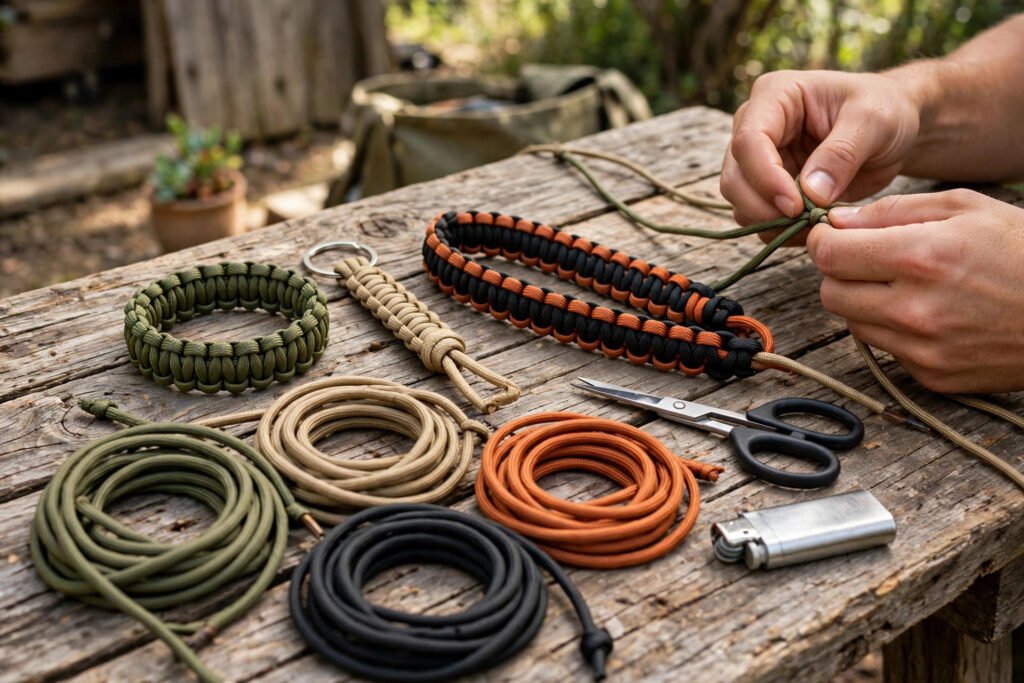
Most people buy their first hank of 550 paracord, watch one complicated bracelet video, and stall. The cord sits in a drawer because the first project was too ambitious, the weave rate was wrong, or nobody told them how much cord to cut in the first place.
Paracord crafts for beginners should do the opposite: small projects, forgiving weaves, and a finished item in under an hour. Every project below uses standard 550 paracord unless stated otherwise, lists the exact cord to cut, and teaches one skill you will reuse in bigger builds. If you are brand new, work through them roughly in order — each one is a little harder than the last.
Before you cut anything, run your numbers through the Paracord Length Calculator. It is faster than guessing, and guessing short is the number one way beginners waste cord.
What You Need Before Your First Project
You do not need a workshop. For all seven projects below you need:
- 550 paracord — start with two 25 ft hanks in different colours. One solid (olive, tan or black) and one patterned or bright colour makes two-colour work easier to follow.
- Sharp scissors or a craft knife — paracord frays if you tear it. Cut clean, then melt.
- A lighter — for sealing every cut end. Hold the flame just off the nylon for 2–3 seconds until the end mushrooms slightly, then press flat with the side of the lighter.
- A tape measure and masking tape — measure twice. Tape marks your centre point and stops a weave sliding while you learn.
- One side-release buckle (3/8 in or 1/2 in) — only needed for the bracelet projects.
That is it. No jig is required for anything here, though a simple board with two nails helps keep tension even on bracelets once you move past project three.
How Much Cord These Beginner Projects Actually Use
Cord use depends on weave tightness and finished size, but these working rates are reliable for standard 550 cord:
- Cobra weave: roughly 1 ft of cord per 1 inch of finished bracelet (both core strands included in the cut).
- Fishtail weave: roughly 0.8–0.9 ft per inch — a little leaner than cobra.
- Simple overhand / lanyard knots: plan on the finished length plus 12–18 inches for knots and tails.
- Keychains (4–6 inches): 4–5 ft is generous for most single-colour designs.
For a full size-by-size breakdown across bracelets, belts and leashes, see our paracord length chart, and the deeper explainer on how much paracord you need for any project. The rule for beginners is simple: cut 10–15 percent long. Trimming excess is easy. Adding cord mid-weave is not.
1. The Simple Paracord Keychain (15 Minutes)
Cut: 4 ft of 550 cord. Finished: about 4 inches plus a loop.
Fold the cord in half, push the loop through a split ring, and pull the two ends through the loop (a lark’s head). Then tie a series of overhand knots or a short cobra section down the two core strands. Finish by trimming and melting both ends.
Skill learned: finding the centre, keeping tension even, and melting ends cleanly. If your knots lean to one side, your pulling hand is tighter than your holding hand — consciously loosen it for the next knot.
2. A Two-Colour Lanyard for Keys or a Knife
Cut: two 3 ft lengths in different colours, melted together or joined with a simple knot. Finished: 18–20 inches.
A box weave (four strands, each strand over the next in rotation) looks impressive and is genuinely hard to mess up once you complete the first three rounds. Work slowly for round one, check that each colour stays on its own side, then speed up.
Skill learned: managing four strands without losing the pattern. Tape the starting end to the table for the first few rounds — every beginner does, whether they admit it or not.
3. Your First Cobra Bracelet
Cut: about 10 ft for a 7.5–8 inch wrist. Measure first using our guide on how to measure your wrist for a paracord bracelet — a bracelet woven to the wrong size teaches you nothing except how to unpick knots.
Anchor the cord to the buckle, then alternate the cobra knot left-over-right, right-over-left down the core. That alternation is the whole secret: repeat the same side twice and the bracelet twists into a spiral. A spiral is not ruined — it is just a different finish — but flat is the goal here.
Skill learned: the cobra knot, which is also the base for the Solomon bar, most survival bracelets, and half the projects in our roundup of easy paracord projects for beginners.
4. A Fishtail Bracelet (Thinner, Faster)
Cut: about 8–9 ft for an average wrist.
The fishtail uses two working strands crossing over two core strands in a figure pattern. It sits flatter and thinner than cobra, uses slightly less cord per inch, and is more forgiving if your tension varies — small inconsistencies hide in the weave instead of showing as lumps.
Skill learned: reading a weave. By the end of a fishtail you should be able to look at three rows and spot where a cross went wrong. That eye is worth more than the bracelet.
5. A Zip-Pull and Gear Tag Set
Cut: 18–24 inches per pull — a perfect use for offcuts.
Short cobra or overhand sections on pack zips, tent zips and jacket pulls. Make four to six in one sitting in a bright colour and you will find your gear faster in low light for years. This is also the honest use for the short leftovers from projects one to four — do not throw offcuts under 2 ft away until you have done this project once.
Skill learned: working short. Handling 20 inches of cord without tangles is a different discipline from a 10 ft bracelet cut, and it is the one you will use most often in the field.
6. A Wrapped Handle or Torch Grip
Cut: 6–8 ft for a torch or tool handle, depending on diameter.
A simple whipping or cobra wrap around a handle adds grip and stores usable cord on the tool itself. Keep each turn snug against the last with no gaps, and tuck the finishing end under the last three turns before trimming. Our guide on how to finish paracord bracelet ends covers the melt, trim and tuck method that works here too.
Skill learned: wrapping under tension and tucking an end so it cannot work loose — the same finish used on much larger handle wraps and leashes.
7. Step Up: The King Cobra Bracelet
Cut: about 18–20 ft for an average wrist (a cobra base plus a second cobra layer over it). Check the exact figure for your wrist size in the Paracord Length Calculator before cutting.
Once a plain cobra feels easy, weave a second cobra directly over the first following our king cobra paracord bracelet tutorial. It doubles the cord stored on your wrist and produces the thick, squared profile most people picture when they think of a survival bracelet.
Skill learned: layering a weave without crushing the layer underneath. Keep the second layer firm but not strangled — if the bracelet curls, the top layer is too tight.
Common Beginner Mistakes (and the Honest Fixes)
Cutting too short
The most common failure, full stop. Weave rates are averages, and tight weavers use more cord. Cut long, note what you trimmed off, and write that number down — your personal weave rate is more useful than any chart after two or three projects.
Uneven tension
Lumps and twists almost always trace back to one hand pulling harder. Slow down for the first inch of any weave; tension habits set early in a piece tend to stay for the whole piece.
Skipping the melt
Unmelted 550 ends fray within days and a weave can work itself loose. Every cut gets melted. No exceptions, even on practice pieces.
Starting with cheap, flat cord
Some bargain cord is flat, loosely sheathed, or missing inner strands — it will not hold a clean weave and it makes learning harder. You do not need premium cord to learn, but you do need real, round 550 with proper inner strands. Learn on decent cord, then judge bargains with experienced hands.
What to Make Next
After these seven, you have the centre-finding, cobra, fishtail, wrapping and finishing skills behind most intermediate work. Natural next steps are a paracord dog leash, a belt (a long cobra or king cobra — budget 60–80 ft and an afternoon), or a monkey’s fist keychain when you are ready for a knot that fights back a little. Pick the project you will actually use; a finished, carried item teaches you more on every outing than a perfect item in a drawer.
FAQ
What is the easiest paracord craft for a complete beginner?
The simple keychain in project one. It needs about 4 ft of cord, one knot pattern, and about 15 minutes. You will learn centre-finding, tension and end-melting — the three basics behind almost every other project — with almost nothing at stake if it goes wrong.
How much paracord do I need for beginner projects?
Most beginner projects here use 4–10 ft each. A bracelet typically takes about 1 ft of cord per inch of finished length in a cobra weave. For an exact figure for your size and weave, use the Paracord Length Calculator linked above and add 10–15 percent while you are learning.
Can I learn paracord crafts with 275 or other thinner cord?
You can, but 550 is easier to learn on: it is thicker to handle, knots are easier to see and unpick, and most tutorials assume it. Move to thinner cord for finer keychains and lanyards once the basic knots feel automatic.
What do I do with leftover short pieces of paracord?
Keep anything over about 18 inches. Offcuts are perfect for zip pulls, gear tags, practice knots and testing a new weave before committing a full cut. Shorter scraps still work as melted practice ends when you are teaching someone else to finish cord cleanly.