
Throughout this tutorial, I will be showing you how to make a pouch out of paracord. This particular pouch is made to fit an Altoids tin. For many outdoorsmen or survivalists, Altoids tins are the perfect containers for a small, pocket survival tin. I like using the pouch for my survival tin so I can pack more stuff into the tin and not worry about it popping open.
The pouch is a cobra weave worked around the tin — the same knot as a cobra bracelet, in two colors, sized to the tin’s border. Once you know the cobra knot, the pouch is mostly a matter of measuring carefully and keeping the tension even.
What you need
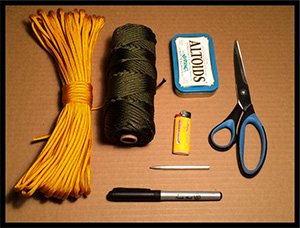
- 20 ft of 550 paracord (Type III), color 1
- 20 ft of 550 paracord (Type III), color 2
- Lighter
- Altoids tin
- Marker
- Scissors
- Paracord fid needle
If you want a one-color pouch, use two 20 ft lengths of cord in the same color, or one 40 ft length and make no cuts from beginning to end. Buy genuine Type III cord — a tight nylon sheath, 7 inner strands, about 4 mm across. Our best paracord guide shows how to spot the real thing.
How much cord
This pouch uses 40 ft of cord in total — two 20 ft lengths, one per color. The cobra weave consumes about 12 inches of cord for every finished inch of braid, so a pouch for a different tin size needs a different starting length. The Paracord Length Calculator works out the exact cobra cut length for any finished size.
Steps
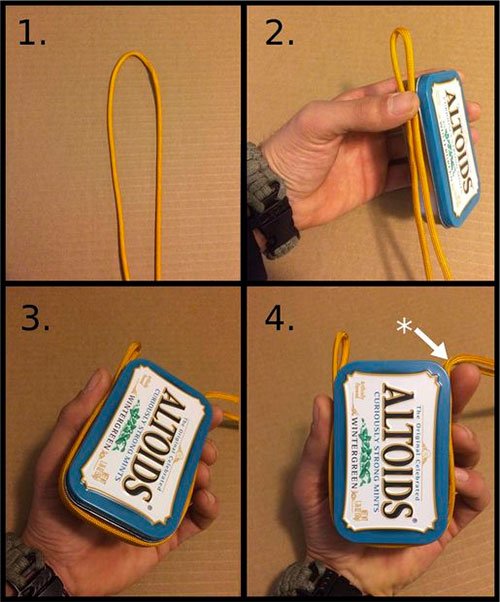
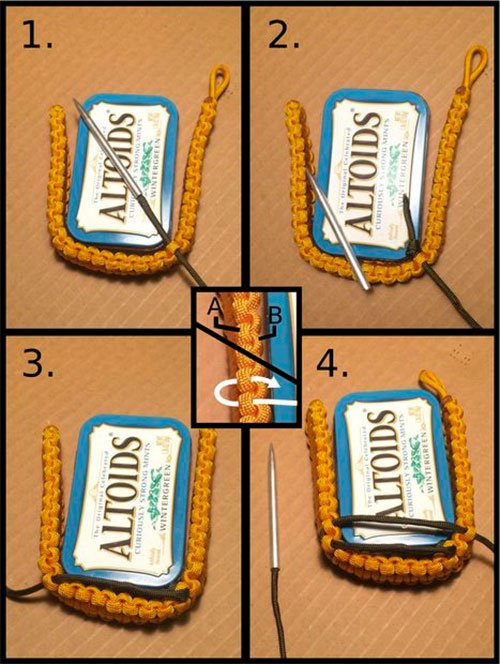
- Measure for the border of the pouch. Start by creating a simple cow hitch: fold your cord in half, take the midway point of the folded cord and form the starting loop, then pass the loose ends through the midway point and pull tight. Make sure the two ends are equal lengths — adjust if they are not. Measure the border against the Altoids tin and mark it with the marker: the pouch is woven to fit the tin, so this measurement sets the size of the whole piece.
- Prep the inner cords. The numbers in the diagram match the parts below — follow closely, because the pictures help a lot here. Lay out the two inner cords that will form the core of the pouch’s woven body. These are the strands the cobra braid wraps around, so keep them taut and even: the pouch’s shape depends on them.
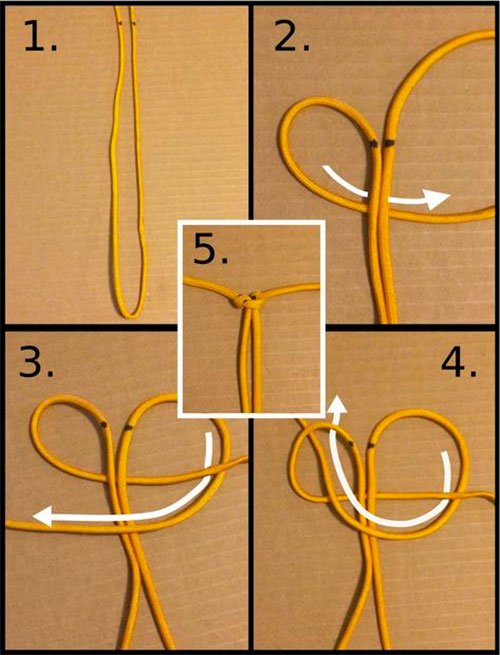
- Start the first cobra braid. Take the left loose cord and make a loop over the inner cords. Bring the right loose cord under the cord you just brought over, then over the inner cords and through the loop. Tighten everything so the braid is nice and tight and up against the starting edge.

- Complete the second cobra braid. Take the right loose cord and bring it underneath the inner cords. Bring the left cord underneath the cord you just brought over from the right, then continue the left loose cord over the inner cords and up through the loop. Tighten accordingly.
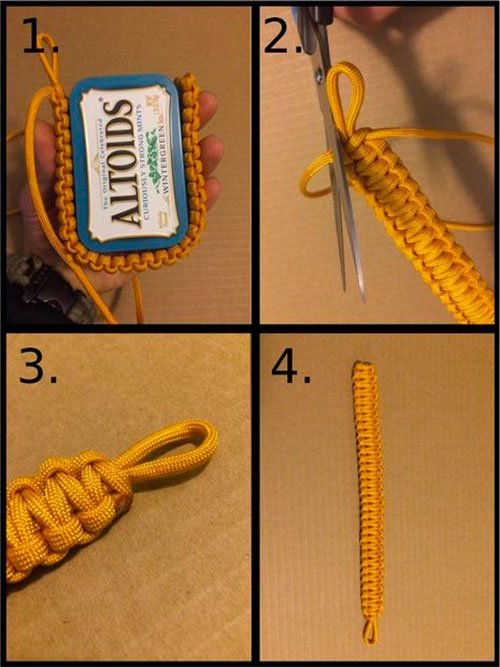
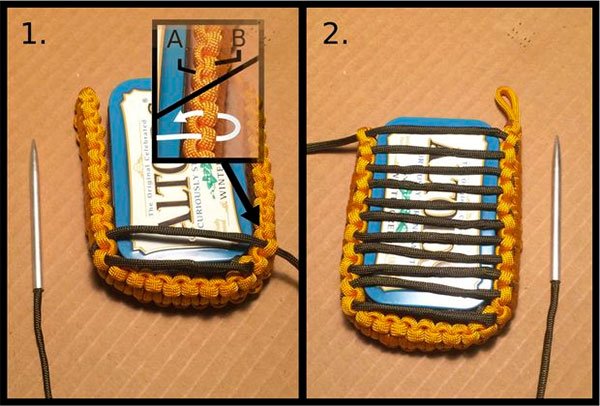
- Tighten the braids. Hold the body of the pouch with one hand and pull the working ends with the other. This tightens everything up and lets more cord feed into the weave. Do this periodically during your braiding — more cord in the weave means a sturdier pouch.
- Complete the third braid. This step is practically the same as the second braid, only reversed: take the left loose cord and bring it under the inner cords, then take the right loose cord and bring it under the cord you just brought over from the left, and continue it over the inner cords and up through the loop.
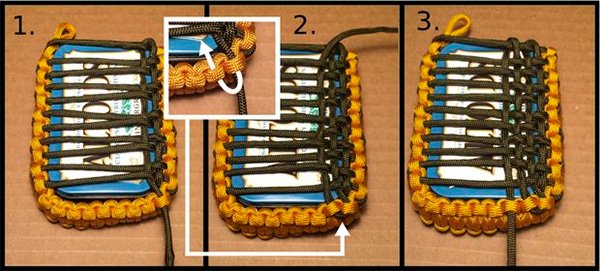
- Braid to the end, then cut and melt the first loose end. Alternating sides, continue the braids all the way to the end of the border. Cut one remaining loose end with your scissors, leaving about 1/8 of an inch. Light the end with your lighter for 4–5 seconds, then wet your thumb and smooth the molten cord flat.
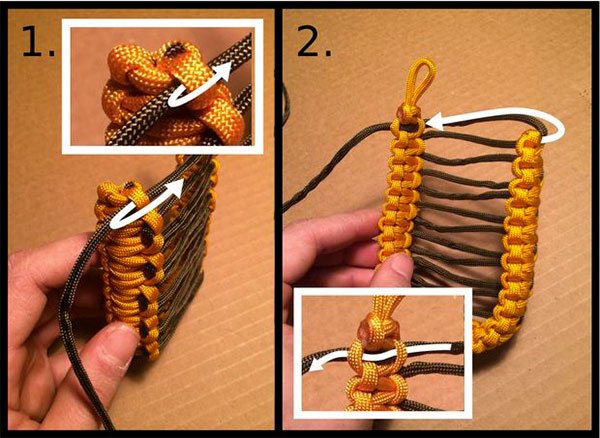
- Check the “mushroom head.” The melted end should overlap the braid — that mushroom shape is what locks the end in place so it cannot pull through. If it sits flat and smooth over the braid, it is right.
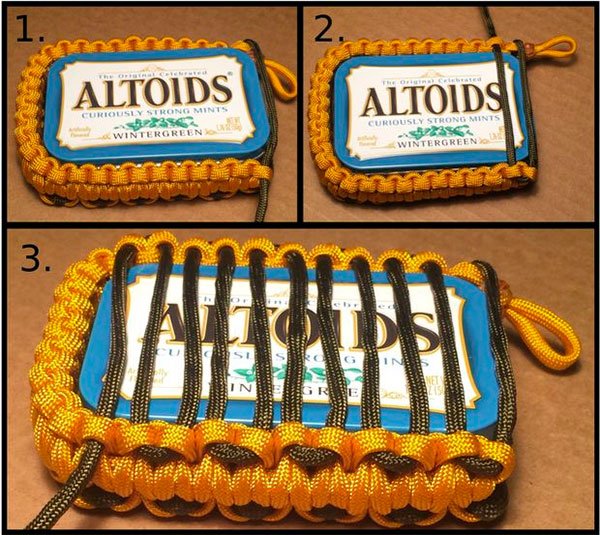
- Tighten the last braid before cutting the final end. Use your thumb to smooth the molten cord and form the mushroom head, then pull the remaining loose end tightly. This cinches the braid around the mushroom head so the end cannot slip out.
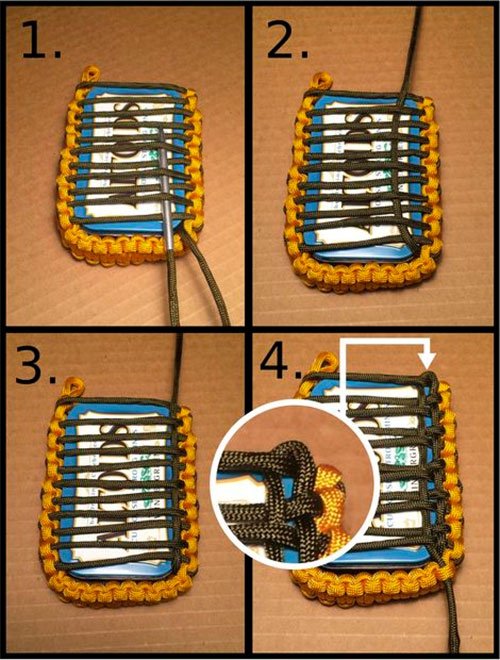
- Cut and melt the last loose end. Cut the loose end, leaving about 1/8 of an inch. Light it for 4–5 seconds, then smooth the molten cord over the braid with your (wet) thumb.

Tips
- Measure the border against the tin before you start. The pouch is woven to fit, and a border measured too small will not close around the tin.
- Keep the tension even. Uneven cobra knots make the pouch pucker, and the tin will not sit flat inside it.
- Use the fid needle to tuck the melted ends under the last braids. It hides the ends and keeps them from snagging on the tin’s edges.
FAQ
How much cord does a paracord pouch take?
This two-color Altoids tin pouch uses 40 ft of 550 cord — two 20 ft lengths. The cobra weave consumes about 12 inches of cord per finished inch, so a pouch for a different tin needs a different starting length. The Paracord Length Calculator gives the exact number for any size.
Can I make the pouch in one color?
Yes. Use two 20 ft lengths of cord in the same color, or one 40 ft length and make no cuts from beginning to end.